 |
| Email Home Page |
|
| Email Home Page |
|
|
Blender has quite a few tools known as MODIFIERS. In most cases, these perform tasks that are much more complex than the simple T-panel tools. Some of these allow real-time adjustments and others have to be 'applied' to see the results. For those that have to be applied, if you don't like the results, you have to use CTRL-Z (undo) to go back to before the modifier was applied. For the real-time types, you can adjust to get what you want and then apply the modification.
Bear in mind that before you apply something like the ARRAY modifier, you can edit the original object in EDIT mode. All transforms will be passed to the objects being arrayed. After applying the modification, IF the original object remains editable (it may become part of the array, and all as one massive object), the edits will not likely pass to the other arrayed components.
In many of the various online tutorials, they show the modifiers being used but don't show how they can also trip you up. Here and on other modifier pages, you'll see some of the simple things that can make the modifiers produce unexpected results.
On the TEXT page, you saw the icons in the PROPERTIES panel. If you have an object that can have a modifier applied to selected, the WRENCH icon will be available in the group of icons. That's the MODIFIERS icon. Select an object and click that icon. You will see the ADD MODIFIER button. Click it and choose BOOLEAN.
First will be the BOOLEAN modifier. This can be used to take the DIFFERENCE between two intersecting objects (good for drilling holes). The INTERSECT option can be used to permanently join two objects and can be used to leave only the bit where two intersecting objects occupied the same space. In THIS file, you can see the various operations and their results. The parts (cylinders or cubes) that remained after the modifier was applied were moved town to -5, below the grid. The text gives a short description of the process for each group. In the booleantest02.blend file, there is a dark gray plane between the objects and the objects that remained after applying the modifier. If you want to see them, click the eye icon in the outliner or click the plane and click the H-key.
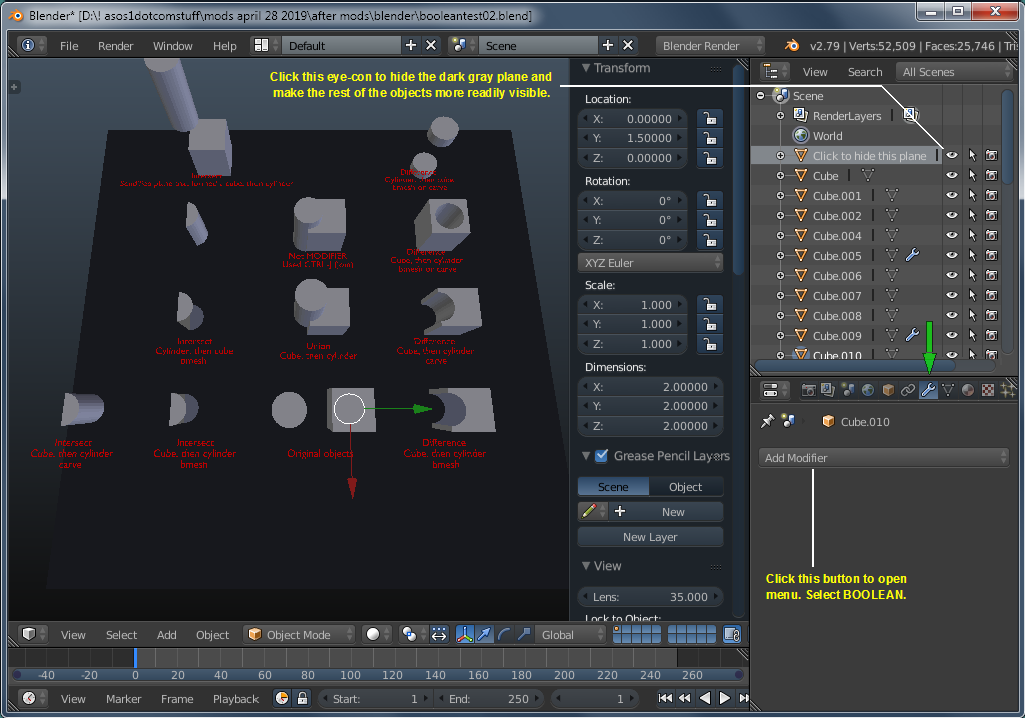
To use this modifier, you decide what you want the intersecting objects to produce. For DIFFERENCE, you will select one object, pick the DIFFERENCE option. Use the eye-dropper (or select from the object menu) the intersecting object and click apply. After applying, you will move the object selected with the eye-dropper to see the results. The image above shows many of the results from various boolean modifications. Open the booleantest02.blend file (link above image) and move around, looking at the various objects. Remember to go to wireframe to compare the 'joined' object to the object that is a product of the UNION feature of the BOOLEAN modifier. The items below are some of the things you should know and some of the problems you could have when using this modifier.
