|
| Email Home Page |
|
| Email Home Page |
|
|
In most software, you select with the left mouse button (when you select through clicking). By default, in this software, the left click is used to place the 3D cursor and to verify the position (drop) of various objects. Selecting is done with a right-click. This can be changed in the user preferences dialog box. In some instances, you may have to jump through quite a few hoops AND get an act of Congress to get the desired points selected. A simple wrong click can undo all of that work. Don't redo all of that work, simply use CTRL-Z to 'undo' the de-select (or virtually other mistake - it sure would be nice if life had a control-z).
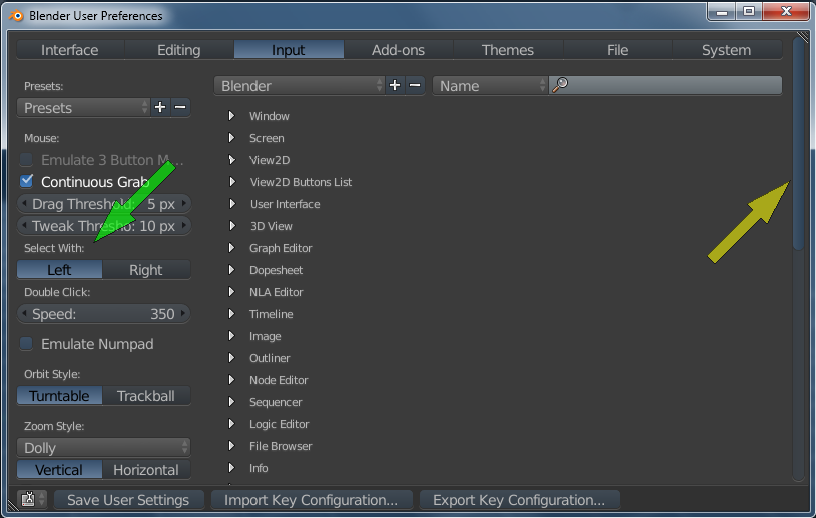
To reverse the right and left-click for select and set the position of the 3D cursor, go to FILE >> USER PREFERENCES under the INPUT tab and change the SELECT WITH: from right to LEFT.
You should expect that there are a lot of options to make various selections in Blender. The simplest it to click on an object to highlight it so you can do something to it or with it. The simplest is moving it... or maybe deleting it. Moving and the ways to move various objects is covered on a seperate page. Here, we're only going to discuss it as needed for the process of selecting. When you open blender, you're given a cube and the cube has already been selected (as you can tell by it's glowing outline). If you click the 'A' key, the outline will go dark. If you click the cube, the outline will glow again letting you know it's selected.
Let's make a second cube. highlight the original one and click CTRL-C. This will bring up a menu. Select COPY TO BUFFER. Now the cube is in memory. Grab the green widget handle and slide the original cube to the side. Now click CTRL-V to paste a new cube. Move that one to the other side. Now paste one more. You can leave it in the center. Now, as you click each cube, you can see that each is selected, individually. To select more than one, hold down the shift key and click on each one you want selected. Now, if you grab the widget arrows, you can move all that are selected. If you CTRL-C again to copy while more than one is selected, it will copy all to the memory buffer. If you copy and move the selected ones and CTRL-V, you will make multiple copies.
What if you want to move all of them at once? You don't need to select them individually, you can use the A key. It toggles selection. If any were selected, they will be de-selected. If none were selected, the A key will select all. Try it. Now move them with the widget arrow. OK, that's probably not what you wanted because the light and the camera moved when you said action (with the widget arrow).
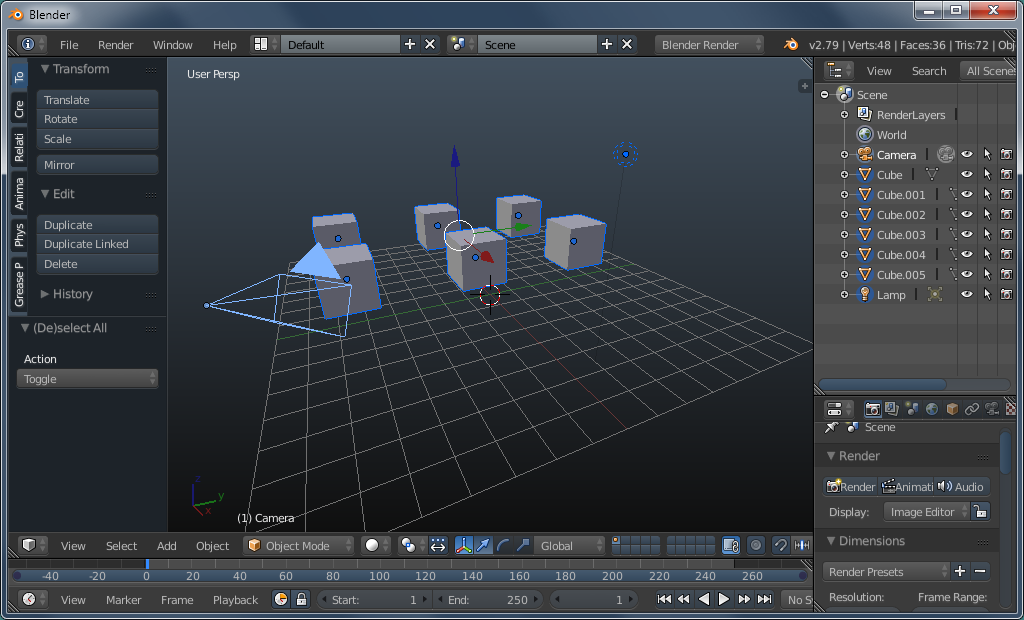
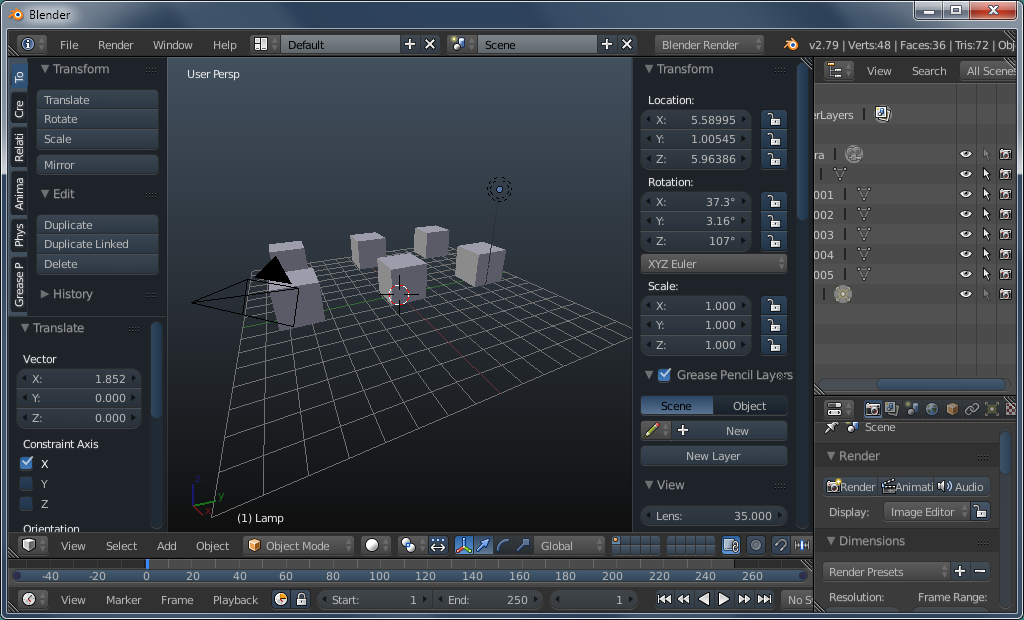
The upper-right section in the images above and below is the 'outliner' (as in what you make when getting started writing a 'paper'). In the one above, all items have an arrow in the three-column list of icons. You'll also notice that everything in the workspace is highlighted from using the 'select all' command of the A key. If you go in and click the arrow for the items that you don't want selected, the various selection actions in the workspace will not be able to select them. If you need to manipulate them IN the workspace, you can re-click the little arrows. For many of the things you'll need to do (make minor changes), you can click on the name of the item in the outliner (camera, lamp...) and then make entries into the text fields for location, rotation... in the number panel. Remember that you can click and hold on those fields and slide your mouse to make adjustments.
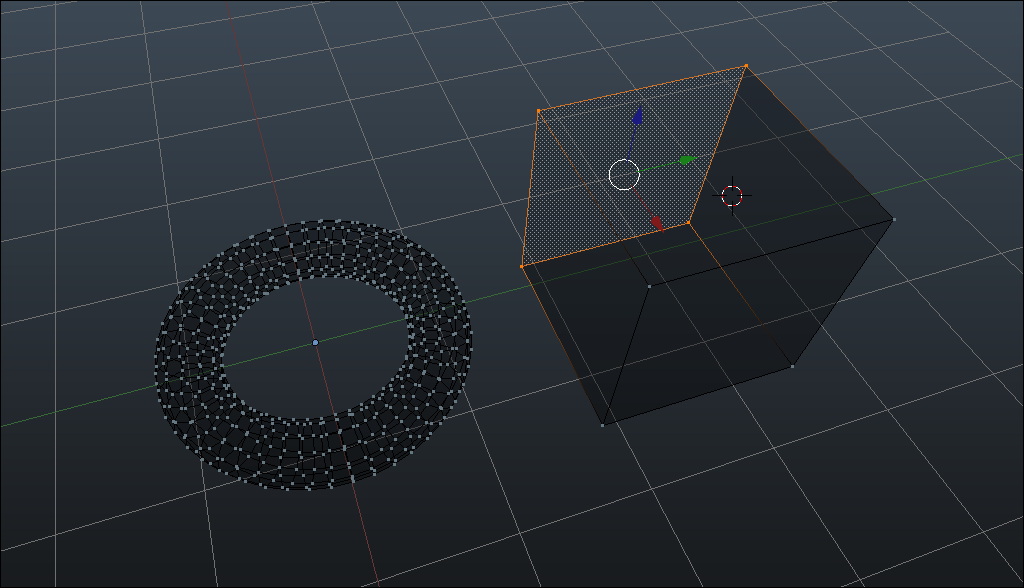
Above, it was stated that you may have to select a lot of points and it may be time-consuming. For something like a simple cube, there are only a small number of components to select. For something like the torus below, on the left, you may have to selectively pick out vertices (the dots at the ends of the edges) to get what you need. I wanted the internal curve for a drawer pull so all of the other vertices had to be selected and deleted. This mainly for those who have never seen the internal structure of a simple torus (limited number of faces). One more thing that you could take from this image is that the rear face of the cube is selected along with its four edges and their endpoint vertices. Also, notice that the edges leading away from the vertices are highlighted but fade as they get farther away from the vertex.