|
Box Fan Salvage/Repair
Foreword:
This page involves working on a piece of equipment that is going to be plugged into the AC mains outlet. Common sense and attention to detail is required. If you see a bare wire or something similar that could be a fire or shock hazard. Consult someone with knowledge in this field to advise you on a safe way to repair the problem.
Use of Circulating Fans:
When it's hot and you're trying to conserve energy (electrical), it makes the room feel cooler if there is air moving. It not only helps distribute the cool air but helps you cool off by increasing the rate of evaporation from your skin. Fans don't cool the air but they make it feel cooler.
Not About Saving Money:
This should prove useful for those who don't like throwing out something that's useful and easily repaired. The cost of a new fan is negligible but, if nothing else, repairing it will keep it out of the landfill.
Common Problems:
With use, fans will develop problems. I have several of the Air King (Lasko) fans and they are generally well made but have a couple of common problems. If you have a similar fan, this will be helpful. Even if the fan you have it different, if it's repairable, this may help you to repair the fan you have.
Before you start on this, be absolutely sure that the fan is unplugged. If it has been on recently, you probably need to let the motor cool. If it's really hot, it may take an hour to cool sufficiently to handle the internal parts.
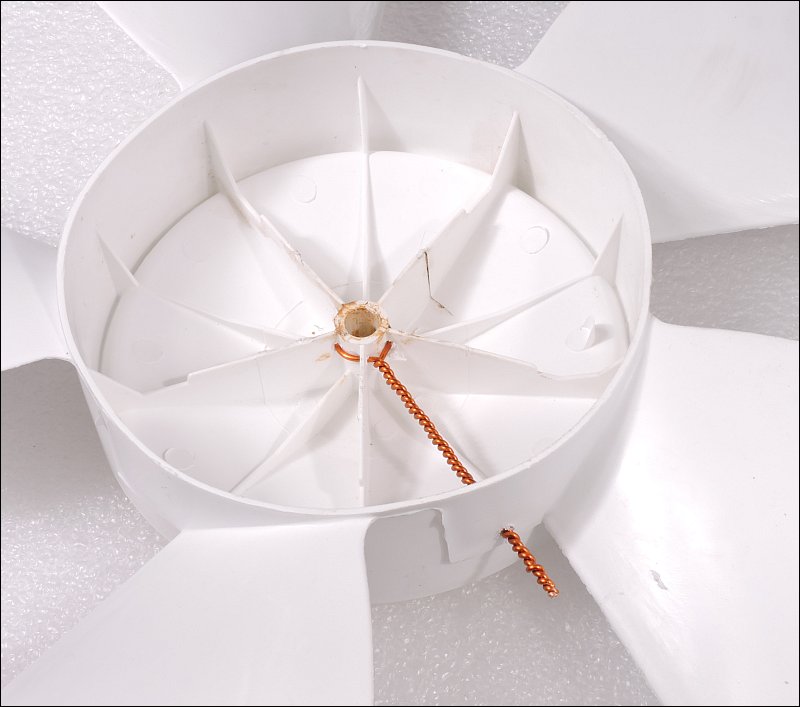
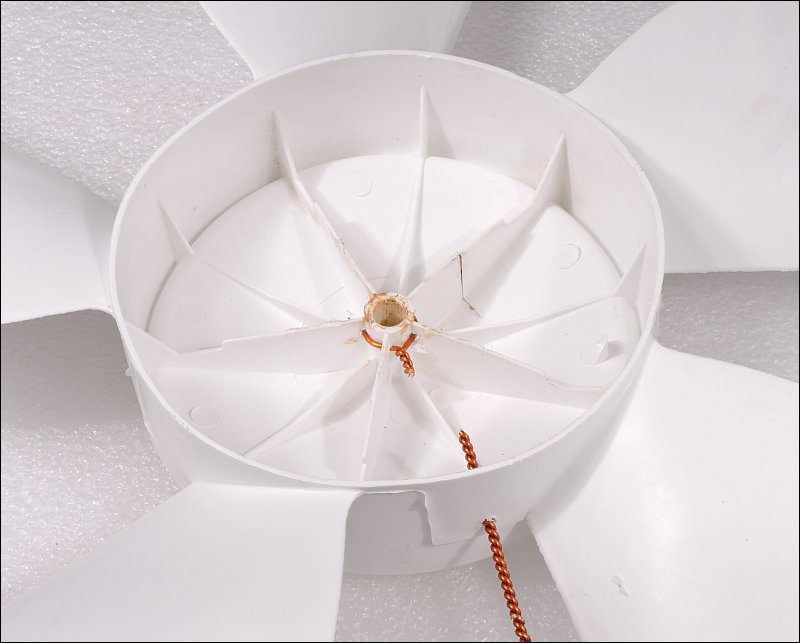
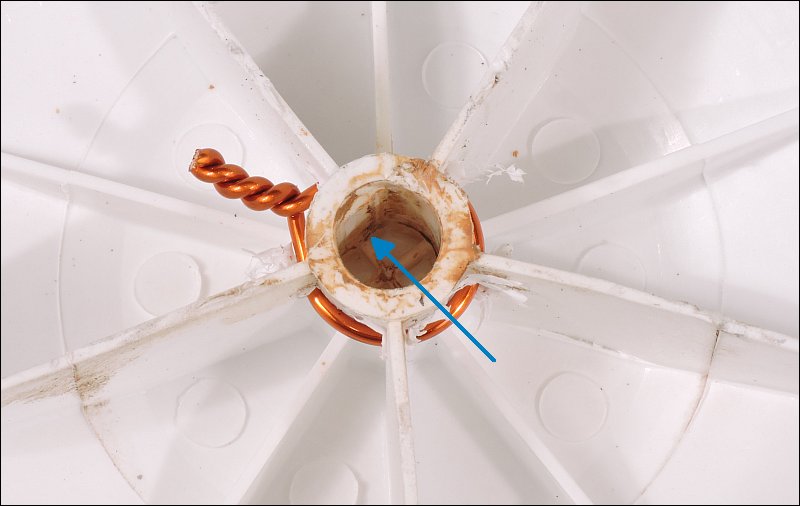
One problem with these fans is that the blade assembly develops cracks around the hub. This causes the blades to slip. If you're lucky, the blade will fall off when you're paying attention. If not, the motor can get very hot and could be damaged. To repair the hub, you can wrap a wire around it and twist it to tighten it up. Below, 14g magnet wire was used. Holes were made in the gussets around the hub and the wire was fed through it and out of a hole in the side of the assembly. The wire was chucked up in a drill and twisted. When doing this, you need to pull on the wire to keep it straight. With the ones that I've done, the 14g wire breaks just about the time when it's perfectly tight. When it breaks, test fit it onto the motor shaft to make sure that it fits tightly enough not to come off. When it does, cut the wire off within about an inch of the hub (not critical but you don't want to cut it off so close that there are no coils to keep it tight).
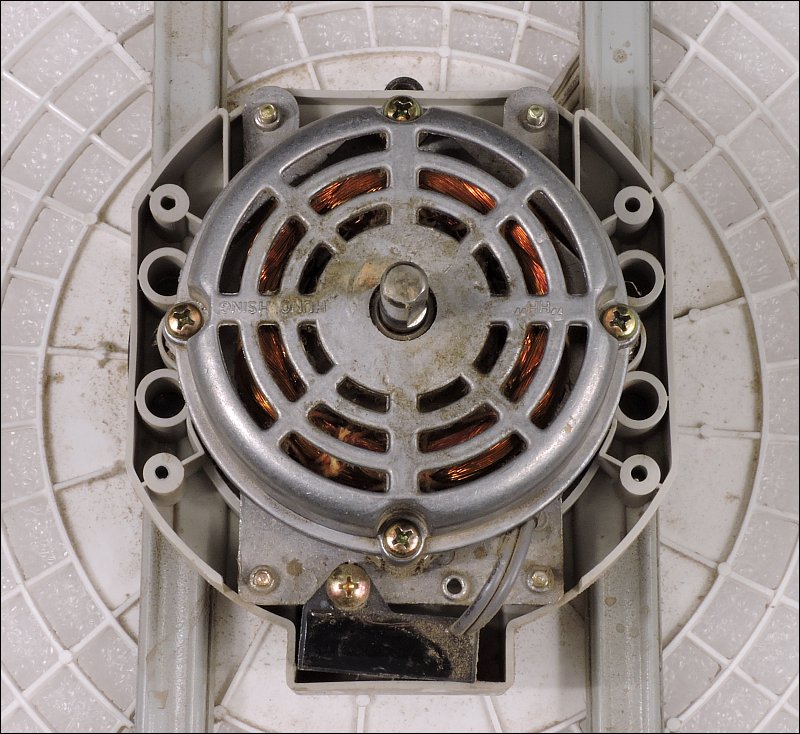
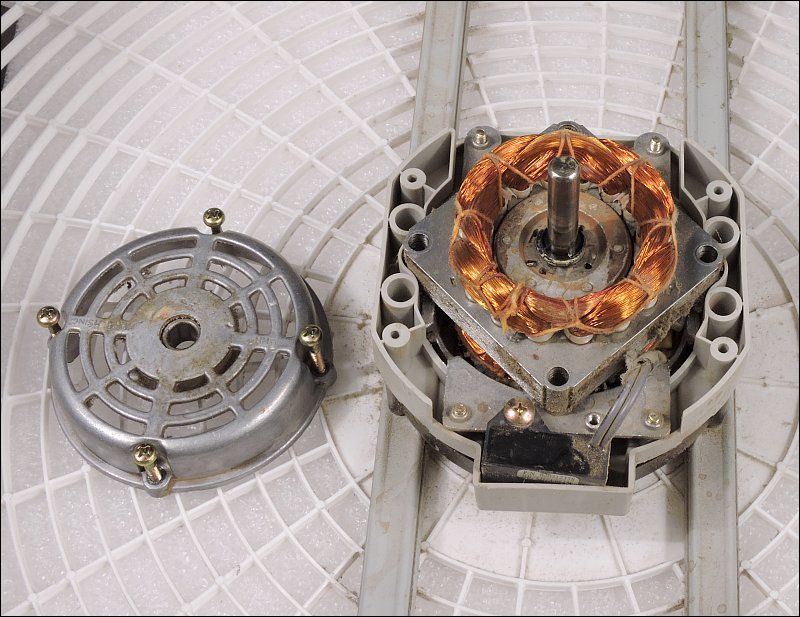
Another big problem is lubrication. It's more difficult to get a good lubricant for these than I would have believed. To lubricate the motors, you need to disassemble them. If the blade assembly isn't off of the motor, remove it. For these fans, the assembly pulls straight off (no screws, no retainers). As you can see, there are 4 screws in the motor housing. You'll need to remove those and remove the front cover of the housing. If the lubricant has dried and hardened, it may be difficult to remove but if the motor is similar to this, the housing cover pulls off after the 4 screws have been removed.
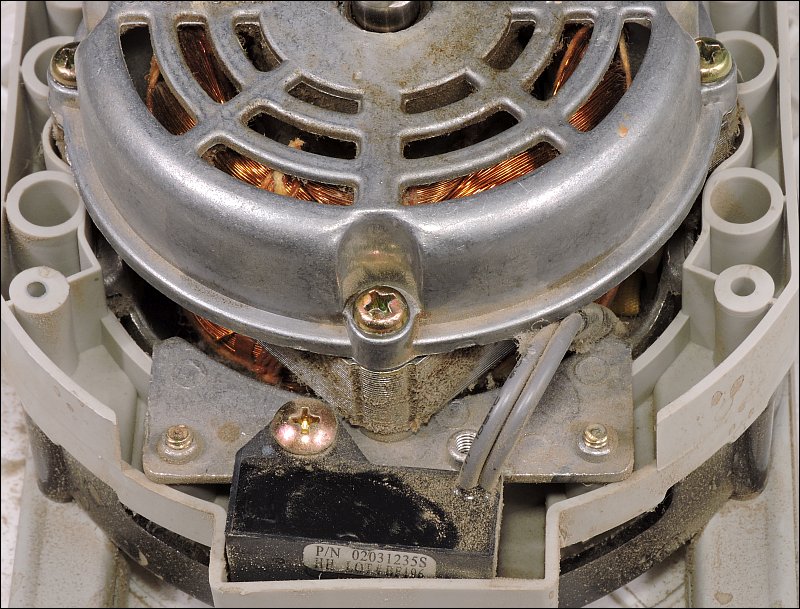
In several images, you can see a rectangular object with two wires going into the potting material. This is a capacitor. This isn't critical to this simple repair but some may want to know that the device is. For this motor, the capacitor is used to produce a phase shift in the AC drive voltage. This is needed to make the motor rotate. Motors like those used in most drills use brushes on a rotating commutator to drive different sets of windings to produce rotation. This type of motor is known as a permanent split-capacitor (PSC) induction motor.
After a year or so of use, these fans will typically be dirty. While it's apart, take all of the plastic bits (grills, blade assembly...) outside, soak them in your favorite household cleaner, let them set for a few minutes and wash them off with the water hose. To clean the motor, use compressed air (outside).
If you plan on repairing these repeatedly, apply a drop of oil or a bit of grease to the tip of the screws before you reinstall them. Install all of them until they just touch. Make sure that the housing cover is flat on the rest of the housing and snug the screws down. Don't over-tighten them.
In some motors, there are brushes to worry about. In these fans, there are no brushes. The rotor pulls straight out of the rear bearing. It should pull out easily but if the old lubricant has hardened, it could have formed a shoulder behind the bushing and could take a bit of effort to pull it out.
When you get it out, you'll notice several washers on the front and rear of the rotor. These need to be kept in the right order and intact. They're often brittle so handle them as little as possible. In most instances, you can just leave them in place.
Thrust Washers:
On some fan motors, you'll see a wavy washer sandwiched between two flat washers. This is a thrust washer. It takes the slack out of the motor assembly. This motor doesn't have them.
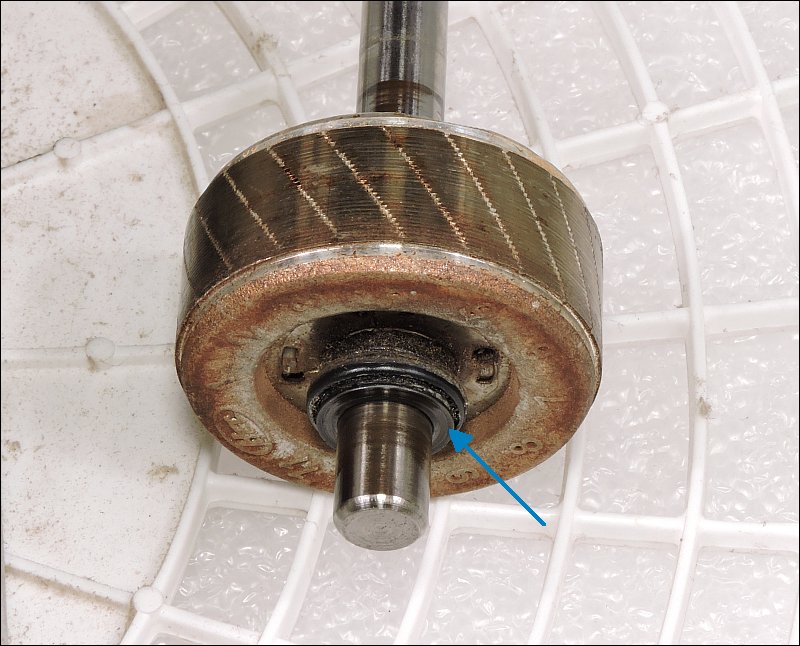
Removing Old Lubricant:
You'll need to clean the old lubricant from both ends of the shaft. For this, acetone and paper towels works well. You need to clean until you can feel no roughness with your fingernails in those locations. The shaft may be discolored but should be perfectly smooth. If it's not, you may have to re-surface it. It's best if you don't have to do this but may be necessary. You'll have to sand with whatever it takes to get the shaft smooth but the final sanding should be wet-sanding with 1500 grit or finer wet/dry sandpaper. Don't use anything more course than that unless absolutely necessary. To sand, you can wrap the flatted part of the shaft in paper (notebook/printer paper) and chuck it up in a drill to spin it.
To clean the inside of the bearings, you'll need to wrap a piece of cloth around a pair of needle-nosed pliers or hemostats (available from Wal-Mart, eBay or any fishing supply retailer), wet it with solvent (acetone) and work it inside the bearing. This works best if the towel fits really tightly in the bearing (packed it, if necessary -- with something that can't scratch the bearing). Clean it repeatedly until the cloth comes out clean.
I don't have a recommendation for a perfect lubricant. I've tried lots of things from wheel-bearing grease to synthetic motor oil. Nothing seems to last more than about a year. It doesn't take long to do this so 20 minutes a year isn't too bad as maintenance. If you have white lithium grease, that works relatively well. I've used Wilson Combat Ultima II and that seemed to last (still have a fan running it so I don't know how long it will last). Whatever you use, don't apply so much that it runs out of the motor.
Getting the Bearings Straight:
The bearings are set in a self-aligning mount. When working with them, they will get out of alignment. When you reinstall the rotor, move the top ed of the shaft in a circular motion to get the back bearing as close to straight as possible. After reinstalling the cover on the housing, tap the end of the shaft from all sides, rotate and repeat until the shaft turns freely. If you don't do this, the fan will never work as efficiently as it should and the fan will need to be repaired again sooner than it would with the bearings properly aligned. When tapping, do so with a small block of wood or the handle of a screwdriver. You don't want to damage the shaft because it will damage the bearing if you have to remove the cover again.
Reinstalling the Blade Assembly:
Since this is a press-fit, the only thing you really have to be concerned about is aligning the flat part of the shaft with the land in the blade assembly. Press it on until it stops. Before sliding it onto the shaft, wipe the shaft with a clean paper towel and solvent (not enough to drip down into the bushing) to remove any oil that could be on the shaft.
Testing:
After you get the fan completely assembled (including the grills installed, because it will make a difference), run the fan at the highest speed and turn it off, use a stopwatch (on your phone if you don't have any other) to measure the time from switching it off until it stops completely. This will give you an idea of when the fan needs to be lubed again. When the time falls to 1/2 of the time just after re-lubing, plan on servicing it again. Use a sharpie to make a note of the date and type of lube used. If done on the bottom side of the top of the fan frame, it won't be visible during normal use.
As with anything, you don't want to repair something like this, turn it on and either leave the home or go to sleep with it running. It should be run for several hours (at least) before you do either. There's always the possibility that there is a problem that could be a fire hazard. This is especially true if the fan motor previously overheated due to a loose fan blade assembly or dried lubricant. It's not likely that there will be a problem but something that you should be aware of.
Back to the Top
|

