Being able to sharpening knives well is a good skill to have. All knives get dull and dull knives make most every cutting task more difficult. In some instances, a dull knife can be more dangerous to use than a sharp one because it requires that more force be applied and a slip can cause serious damage or injury. If you've learned to sharpen knives, you know much of what you need to sharpen other tools like chisels and woodworking plane blades.
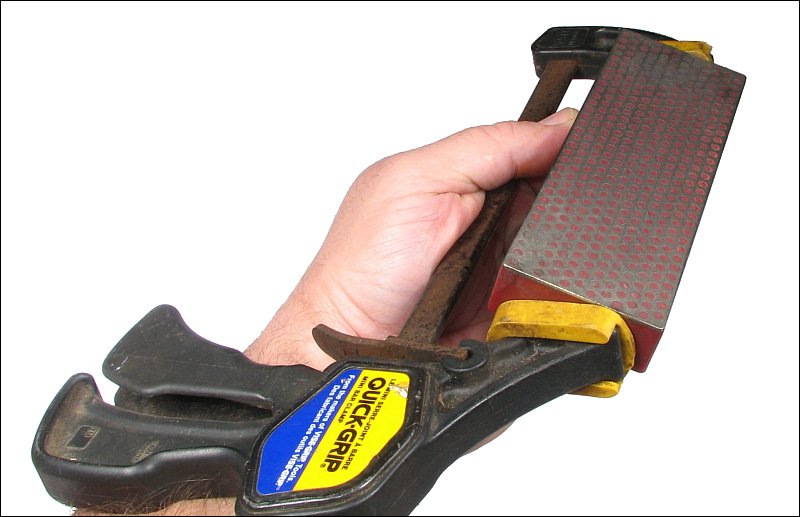
It's personal preference whether you use a stone/hone on the bench or handheld. I prefer to hold the hone in my hand but that can lead to fingers getting in the way of the blade as it's drawn across the hone. There are a number of ways to get around this but this is one of the simplest. The hone is locked in a clamp. With this clamp, it not only gets your fingers out of the way of the blade. It also allows the hone to be held with less fatigue.
Most casual-use knives can be sharpened 'freehand' but for more expensive knives and other precision cutting tools, you'll probably want to use a guide. Precision edged tools have a specific angle on the edge of the blade that was chosen by the manufacturer to be the most efficient for the cutting tool. Sharpening without a guide (especially when you are learning to sharpen knives) will likely result in a change in the angle and could possibly affect the quality of the cut, the effort required to make a good cut or could result in reducing the durability of the edge. In the following graphic, you can see three different blade cross sections. In each group, the image on the left is before sharpening. The image on the right is after (repeated) sharpening. When sharpening most knives, you only repair the edge of the blade. This means that the edge (above the edge grind) gets wider each time you sharpen the blade. On the straight grind, the increase in the thickness is moderate. After the first sharpening, the straight grind blade becomes a compound bevel blade. On the convex grind, each time you sharpen it, the edge gets significantly thicker. The hollow ground blades are often preferred because the blade can be sharpened more times with only a minimal increase in the width of the blade.
When re-sharpening higher quality knives/tools, you'll probably want to keep the same angle as the original edge. If you're using a tool that has a guide with preset angles, you'll need to know which angle your blade has. Sometimes the manufacturer will provide this information but generally, you can set the guide at the various angles to see which matches the edge on your blade. If you know the angle, you can set the guide to the correct angle and begin sharpening. The following image shows various angles. The angle is often just given as the angle from the center-line of the blade to the sharpened edge. This is 1/2 of the total angle.
Previously, it was stated that the manufacturer chooses an angle that's best suited to the task for which the knife was designed. From left to right, you'd expect the edges to be used for a straight razor, a general purpose knife, a survival type knife and an axe/hatchet. The finest angles are suited for blades that need to be very sharp and won't encounter any rough use. The widest angles won't get as sharp but can withstand heavy use cutting through tough materials.
The image below shows how sharpening at the wrong angle can change the edge of the blade. For the top-half of the blade, the angle was too small. Sharpening here will take a lot of work because a lot of material will have to be removed before you actually reach the original edge. Using a larger angle will result in adding another bevel to the blade. In many instances, this isn't a problem but you should check with the owner of the knife to see if that's acceptable.
Note:
Before you volunteer to sharpen knives for others, you should know that some people would be very annoyed if you damaged their knife when sharpening it. If you're not careful, you can damage a blade if you accidentally lay it down too far and the blade contacts the abrasive. This is very nearly impossible to repair, especially if the blade has a special coating or pattern. Placing several layers of tape over the blade (not including the edge) can help protect the blade. If you sharpen a knife for someone and you change the angle of the edge, they may be very unhappy about it. Some knives have only pins at the hinge point. It's possible to cause the blade to loosen if you apply too much force on the blade. If this happens, the knife may have to go back to the manufacturer for repair.
To better understand sharpening, you need to understand the principle behind a sharp edge. Let's use a simple example like showshoes. When walking on soft snow in regular boots/shoes, you sink deeply every time you take a step but when you wear snowshoes, you do not. This is because the greater surface of the snowshoes distributes your weight over a larger area of snow (there is more snow supporting your weight). The snowshoes increase the surface area onto which you're applying downward force. With normal shoes, the weight/force per square inch is greater. The same thing applies to something like an icepick. The sharp point greatly increases the force applied to the ice. As the point gets smaller and smaller, the force at the point of impact increases. Now apply that same concept to the edge of a knife. As the edge gets sharper, it applies the force to an increasingly small line on whatever you're cutting and generates great force at that point. A dulled edge dissipated the force so the knife tries to crush the material instead of separating it into two pieces.
The required sharpener will be determined by the condition of the blade. If the blade has deep notches in it and restoration of the blade is important, you will have to take off a lot of material which means that you're going to have to use an aggressive abrasive (if you want to reduce the time required to remove the material). In the worst instances, it may be practical to use a crude sharpener like those commonly sold to sharpen kitchen knives. Though these are not recommended by most people that sharpen quality knives, they remove material quickly and produce an angle on the blade that's acceptable for many general purpose knives. Remember, this for badly damaged knives. It's not likely that you'll see an expensive knife with a badly damaged edge. In some instances, a belt sander works well to sharpen badly dulled knives. The availability of different abrasive grades allows you to start with a course abrasive and work up to finer grades. When you get the blade to nearly where you want it, you can use a more refined abrasive.
Abrasives:
There are several types of abrasives. The most common are aluminum oxide silicone carbide, and (industrial) diamond. These are applied to paper or cloth for sandpaper. They can also be applied to a metal plates. Diamond coated metal plates are commonly sold as knife hones.. DMT is one of the largest manufacturers of diamond knife hones. Ceramic hones are also commonly used. These are often the finest of abrasives and only used for applying the final edge.
Motion Used when Sharpening and Polishing:
When cutting material from an edge (especially when using a rigid hone or stone), you use a motion that would cut very thin slices from the stone if it were made of a soft material. When producing the final edge on the blade, you may use a softer, more flexible device. When using softer devices, you will pull the knife across them as if you're wiping off the blade. Going the other direction would cut into the softer devices.
Using Sandpaper to Sharpen Knives:
It may not be the first thing you think of when you need to sharpen a knife but sandpaper (on a belt sander or sheep paper on a block) works well. If you're careful, you can use the same motion as you would if using a rigid stone. If you're not careful, however, you will cut into the paper. Generally when using sandpaper, you'll 'wipe' the blade on the sandpaper. The exception is when you have a hard surface behind the sandpaper (as you would have when using a belt sander).
Stones/Hones:
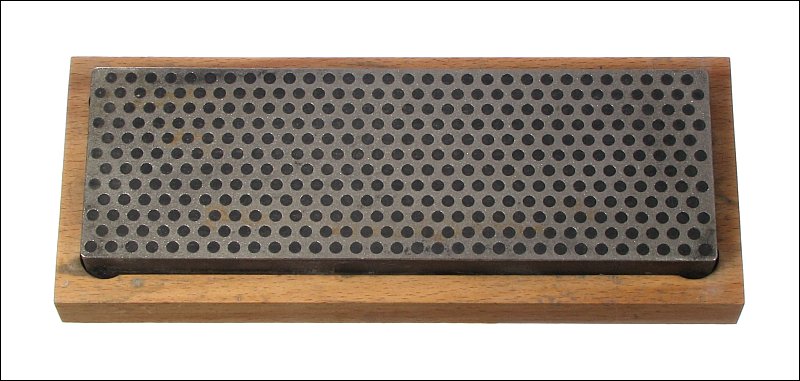
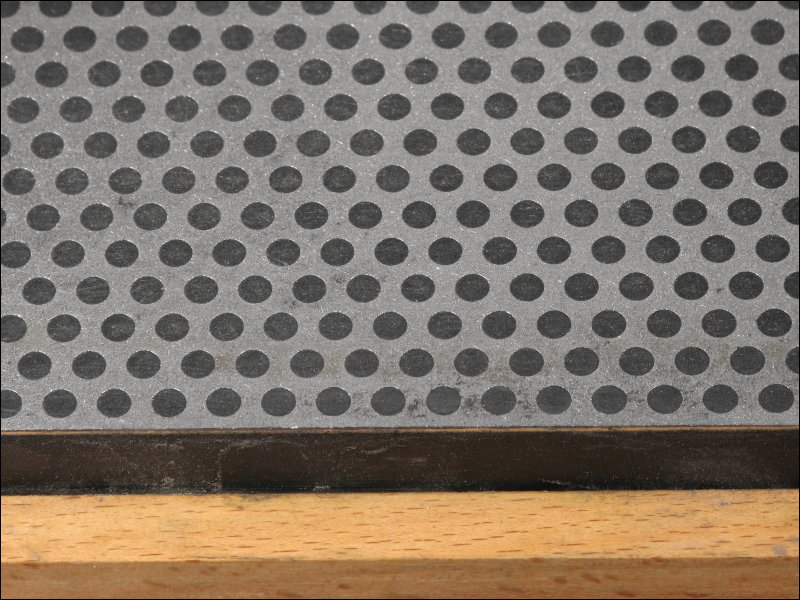
These have generally been the most common devices used to put a nice edge on a knife. The first two images below are of a DMT diamond hone. The diamonds are bonded to the metal surface.
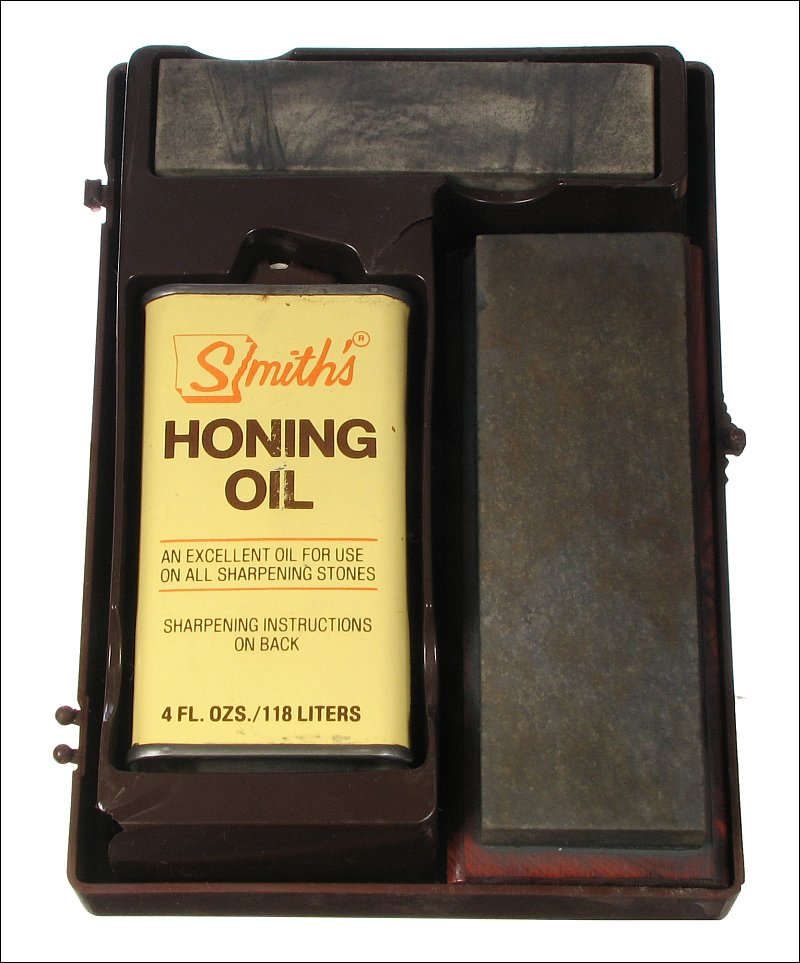
This is an old style 'Arkansas' sharpening stone set. While some may prefer to use this type of stone, most people have moved to diamond or ceramic hones. The Arkansas stones require the use of oil when sharpening. Most other types of stones allow you to use water to keep the abrasive from clogging. Water makes much less of a mess.
Quick and Dirty:
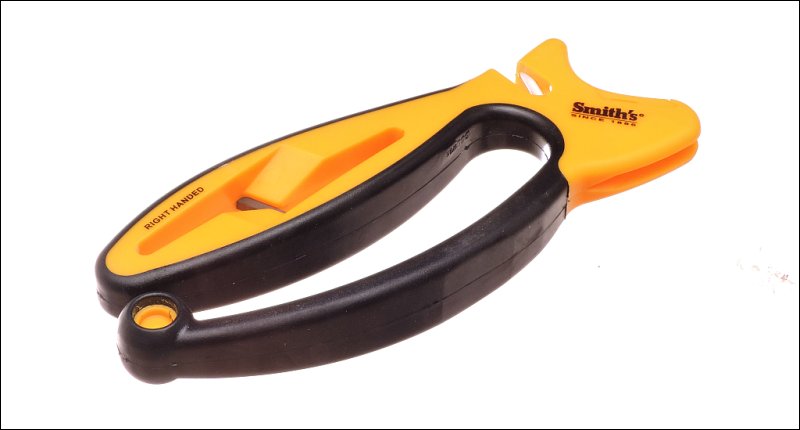
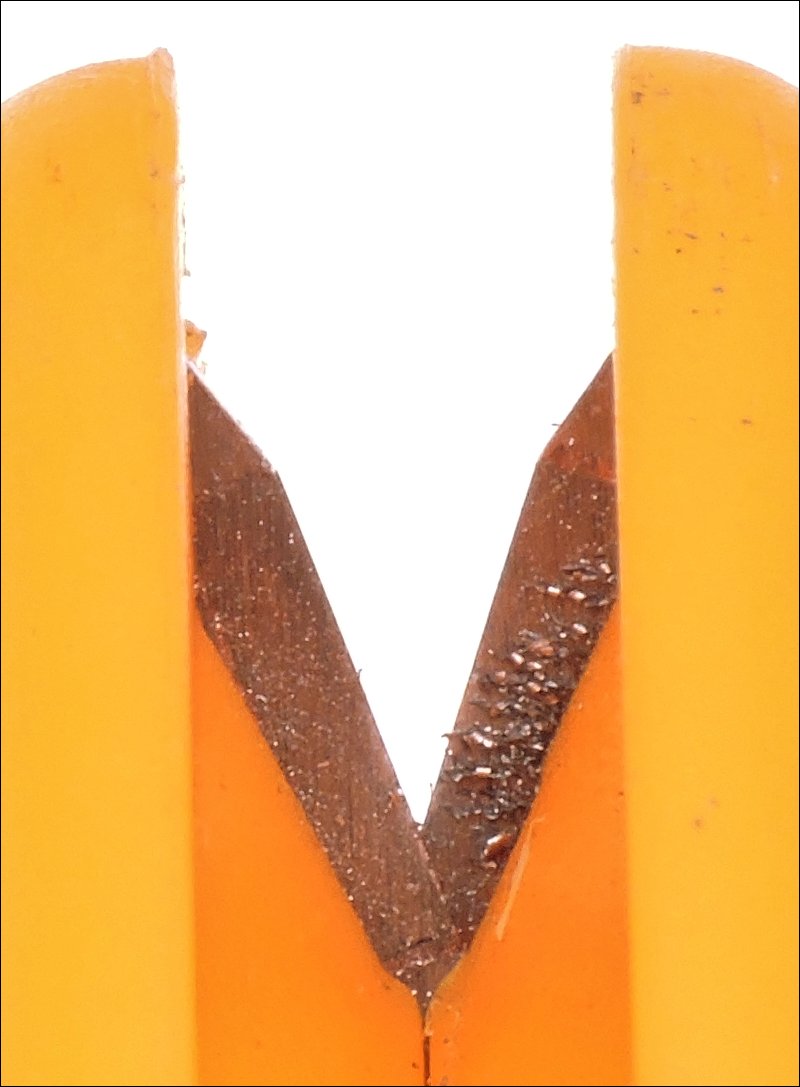
For many people (myself, included), I just want to get a knife sharp as quickly as possible. I'm not a knife collector so I'm not concerned with the perfect edge. The following knife sharpener uses two carbide 'scrapers' that cut all but the hardest blades very quickly. For the first time using it, you will have to make as many as 20 passes to get a poorly sharpened knife back in shape. After you get the angle that's created by this sharpener, just a few passes will get the edge back in shape. For a collectable knife, you may want a perfect, mirror fine edge. While that sort of edge will cut (shave?), it's not the best for a utility knife. This sharpener produces a rough sort of edge. It's not going to be shaving-sharp but it will cut VERY well. In some materials, it will cut better and the edge will last longer than a shaving-sharp knife with a mirror polished edge.
Perspective:
There are expensive/collectible knives and knives that are tools. Knives that are tools are 'consumables' and you can't expect them to last forever. Let's take kitchen knives as an example. You can buy a decent chef's knife for about $10. If used on a hard cutting board, the part of the edge that most commonly contacts the board will dull more quickly than the rest of the blade. You can actually see the dull part of the edge if you look at the edge under a bright light. The dull section will reflect light when viewed at the correct angle. Using a stone to sharpen the knife can require a lot of work to get that section sharp. Using a sharpener like the one above will resharpen very quickly but will take away more metal than a stone. Over time, with repeated sharpenings, the blade will wear away. For me, having a sharp knife every time I use it is worth the cost of about $3-5 per year for the cost of a replacement after 2-3 years of use.
Making Knives:
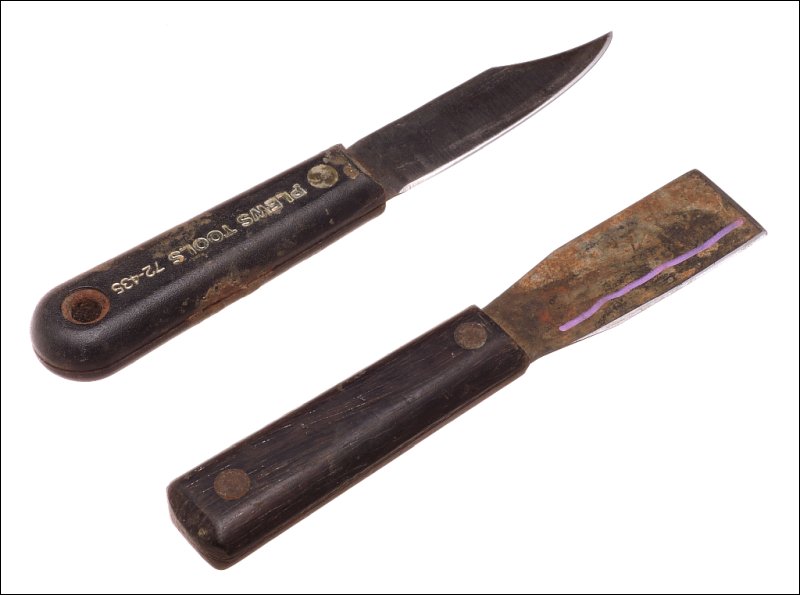
I'll never make a fancy hunting/skinning/survival knife but I have made some very useful knives. Most can be made in about 5 minutes. The top one in the image below was made as a joke. The bottom one is one that I have used when covering speaker enclosures with carpet. The paint line is to I can more quickly determine the cutting edge when I'm not wearing my glasses. This type of knife holds a good edge and is VERY easy to resharpen. When sharpening the square one, you sharpen both the end and the edge so that you have a good, sharp square 'point'. Note that these are made from the heavier grade of paint scraper that's hardened and tempered, not the flexible putty knife. The blade thickness is a bit over 0.035".

 Being able to sharpening knives well is a good skill to have. All knives get dull and dull knives make most every cutting task more difficult. In some instances, a dull knife can be more dangerous to use than a sharp one because it requires that more force be applied and a slip can cause serious damage or injury. If you've learned to sharpen knives, you know much of what you need to sharpen other tools like chisels and woodworking plane blades.