 |
| Email Home Page |
|
| Email Home Page |
|
|
|
When restoring most items, you'll need to strip the old finish. There are several types of strippers. The citrus based strippers are generally safer and can be used indoors. Their odors aren't considered dangerous but can be unpleasant in confined areas. Other strippers are extremely flammable and their fumes can be more dangerous. Most stripping should be done outdoors when practical.
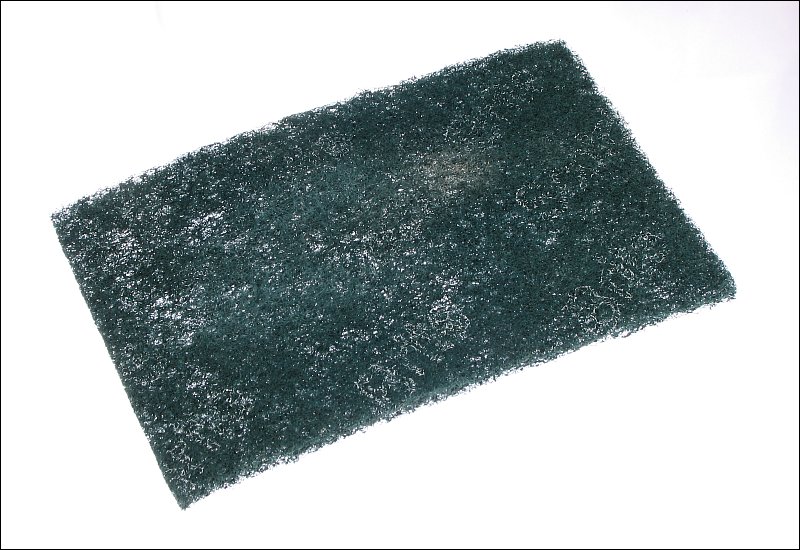
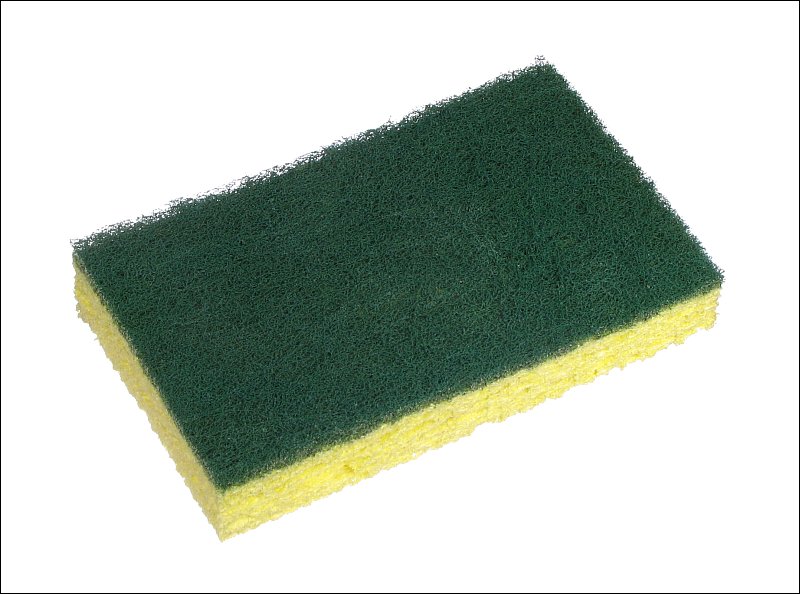
 When applying stripper, the process will work more efficiently if you work the stripper into the finish by rubbing as the finish begins to break down. If you do this, be aware that the stripper will eat through most latex and nitrile gloves. Either use a really thick glove or wear two gloves on each hand. When you see the outer glove disintegrate, you know that you need to change gloves. Sometimes, it helps to wrap the piece that's coated in stripper in plastic wrap (Saran Wrap). This prevents the moisture/solvent in the stripper from evaporating as quickly and can make it more efficient at breaking down the old finish. Generally, when cleaning up after the stripper has done its job (or when you 'think' it's done its job), you'll scrub the piece under running water. It's sometimes quicker if you use a stripping pad. You can use a standard scrubbing sponge but make sure that it's one that doesn't have soap in it. The stripping pad is more porous and easier to clean up to use again. You want to make sure that the old finish has been completely removed. Generally, stained wood retains it's color. To remove the stain/color, it's a bit more difficult (steaming or bleaching may be required). As soon as you get the piece cleaned up, wipe it dry with a rag and let it dry completely before you apply any finish. To speed up the process, you can (carefully) apply heat with a heat gun or place it in the sun to dry (turning it regularly so it dries evenly).
 When sanding or applying finish, it's important that you follow the grain of the wood. You'll likely be tempted to follow the curves/angles in the piece of wood but you have to follow the grain. This will hide minor sanding marks and imperfections in the finish that would show up if you didn't follow the grain. For most work that will have a fine finish, it's generally best to sand by hand. Belt and orbital sanders can remove a lot of wood quickly but that can cause as many problems as it solves. Orbital sanders also have a nasty habit of cutting swirls into the wood. These are difficult to remove and if left can easily be seen in the finished piece.
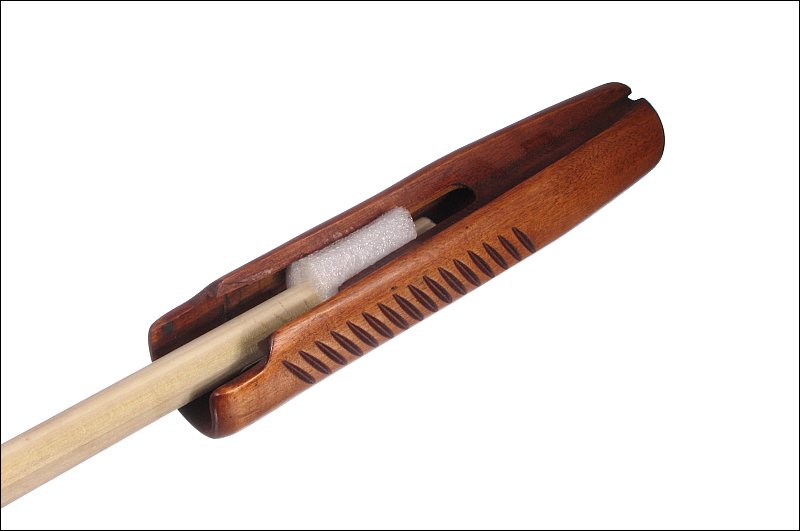
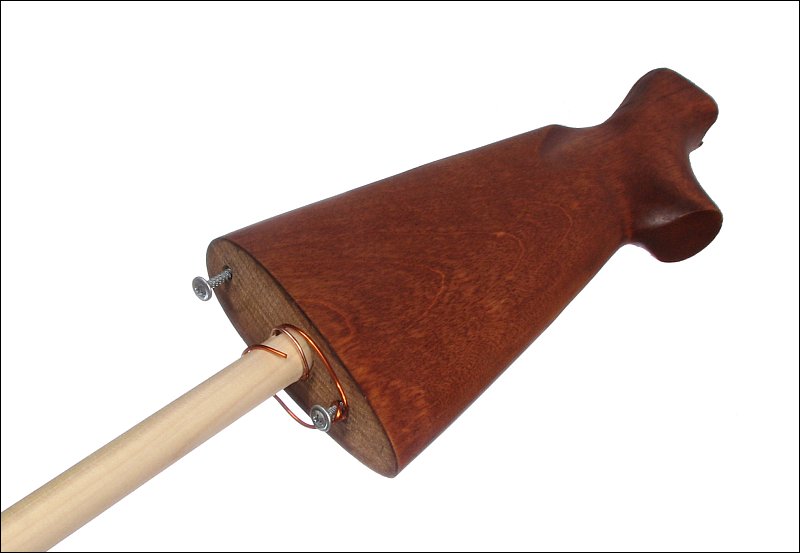
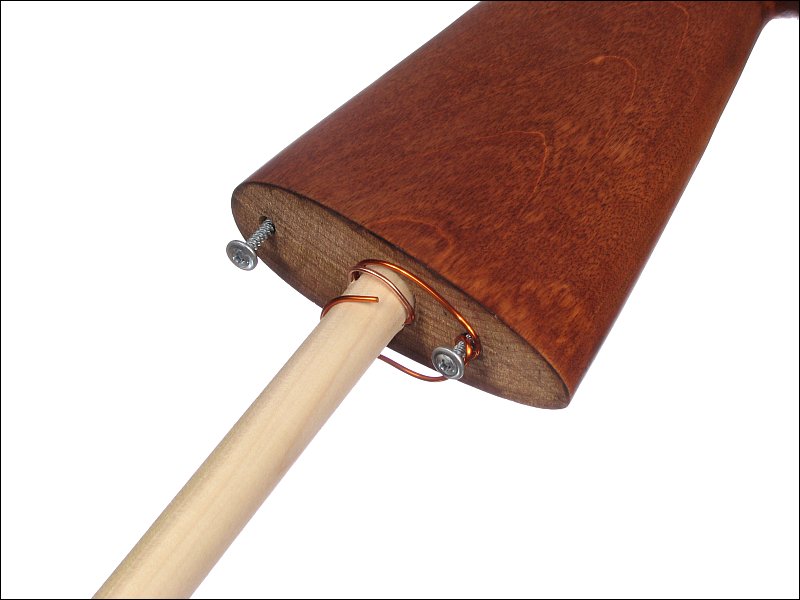
You should know that some woodworking finishes (particularly linseed oil) can produce heat as the finish dries. This isn't a problem on the surface of a piece of wood but it can be a problem if you place the soiled rags and gloves in a pile. When you finish with a rag, you should open it up (unfold it) and allow it to dry. This will prevent it from heating up. Google: When you begin to work with wood finishes, you WILL make mistakes. Start with scrap pieces of wood. If you don't have any scrap, buy various types of wood from a home store or wood supply house. Try to buy the type of wood that you will need to produce a good finish on. If you can't find the type of wood you need, eBay has a lot of sellers that sell all sorts of wood. If you can find pieces 1/4" thick x 3" wide by 12" long, they work very well as practice pieces. When finishing a piece like a gunstock, you'll need to be able to hold it securely and be able to twist and turn it at all angles without touching the surface where the finish is being applied. To attach a handle, you can use the various holes in the stock. Below, there are two examples. In the fore-stock, a piece of foam has been placed in the opening to fill the gap between the dowel and the wood. In the second example, a piece of wire was passed through a hole in the dowel and twisted around one of the screws to prevent it from slipping off of the dowel. Before you start to apply finish, decide where you're going to place the piece to let it dry. It has to be held so that nothing touches the finish. If you have a vise, you can use it to hold the dowel (or whatever type of handle you decide to use).
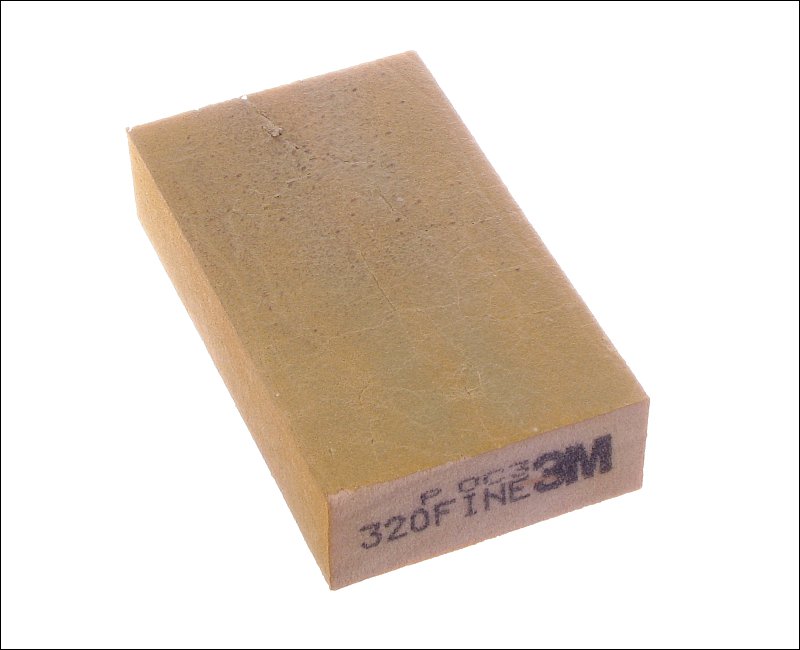
 When refinishing a piece of wood, you need to determine whether or not it needs to be sanded. Many times, there will be deep dents or chips. These are sometimes difficult to repair. Where wood it missing, you need to decide whether you're going to try to fill it in. For some items, it's not practical. If the defects are minor, you can sometimes sand them out. For the worst dings, you'd likely start with 100 grit sandpaper. When you get the area to nearly where you want it, you'd switch to a finer sandpaper, working your way to 220 or 320 grit sandpaper. For rounded/curved areas, foam backed sanding pads or foam sanding blocks work well. It's important that you get the entire surface uniformly smooth. Rougher areas will generally soak up more stain and become darker.
 When you want/need to fill in larger areas, especially where wood is missing, you can use a wood filler for the type of wood you're re-finishing. The filler for a type of wood will be approximately the color of the bare wood. If you intend to stain the piece, you'll need to mix a bit of stain with the wood filler to make it more closely match the color of the finished wood. This may take a bit of trial and error so, where possible, try it on a scrap piece. Where there are areas of compressed wood, you can sometimes steam them out. You apply water to the compressed area and allow it to soak in. You then heat the area (clothes iron through a piece of cloth, heat gun...). The water will boil off and when it does, it will lift the compressed area (and the surrounding area as well sometimes). You do this until you get the compressed area lifted to the level of the rest of the stock then sand the area level. When applying stain, different parts of the wood will take different amounts of stain. As an example, pine is one of the worst woods to try to stain. There are extremely hard areas and extremely soft areas. Without using a sealer or pre-stain conditioner, the soft areas will take just about as much stain as you can apply while the hard areas take very little stain and remain very light in color. Poplar is another wood that can be difficult to stain but a more significant problem is the yellow/green grain. Careful selection of the wood and proper preparation are required to get good results. Some woods (like beech, commonly used for inexpensive rifle stocks) take very little stain. For woods that won't readily accept color, you sometimes have to use a tinted finish. The finish, however, isn't tinted so densely that you can't see the grain. If you're thinking about re-finishing a rifle stock and the finish has peeled (no wood lost) and the wood under the finish is nearly white, you're likely going to have to use a tinted finish.
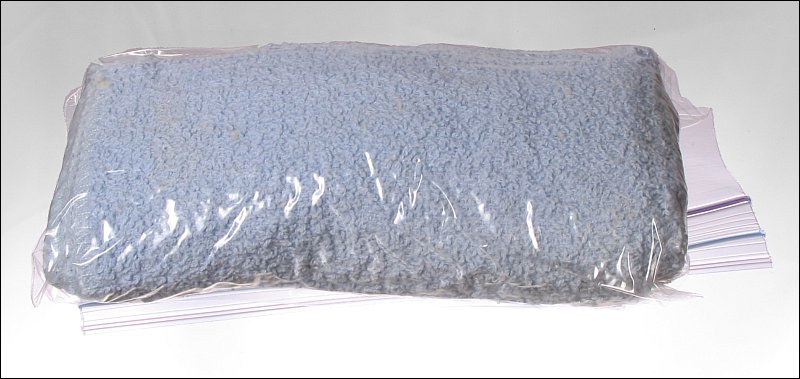
Oak, Walnut and Other Open-grain Woods: When using stain, you should allow the stain to dry completely before applying the clear-coat finish. If the stain isn't completely dry when the top finish is applied, it will take longer for each coat to dry. This can add, significantly, to the drying time of each consecutive layer. Don't get in a hurry. Most quality finishes require at least a couple of days to complete. Some can take weeks. The time required between coats and the total number of coats to get the desired finish should be taken into account when choosing a wood finish. Another method... you can apply the stain and several layers of finish (poly, Tru-Oil, tung oil finish...) then apply the pore/grain filler. Apply another coat of finish and re-fill if necessary. It's important that you remove as much of the filler material as possible from the surface of the wood before it's completely dry. If you do not, you will have to do a lot of sanding to remove it. If it's not removed, you'll have areas where the grain will be completely obscured or dark areas (when using a darker-than-the-wood filler). The 'filling' described previously was to the surface of a piece of wood and is used to reduce the lines in the finish where the grain is open. There is another type of filling. This is for the end-grain. When you have a piece of wood like a gunstock, it's common to have at least one end of the wood visible (not covered by a buttplate or other accessory). Where a stain is applied to the end-grain of a piece of wood (also applies to points like the pistol-grip area of a buttstock), the wood will soak up a lot of additional stain which will make it very dark in comparison to the sides of the stock. To prevent this from happening, you can apply a sanding sealer or pre-stain conditioner. These are generally clear so they don't change the color of the wood. When applying either preparation, keep applying it as long as the wood will soak it up. Then wipe off the excess. Then sand it lightly and apply the stain. You should practice this on a scrap piece of wood before trying it on the piece you're restoring. When applying finish, you need to understand that it will essentially look the same dry as it does when wet. If there is any line/ridge/valley in the finish (brush-marks or marks left by a textured rag), it will be there when dry. This can be difficult to repair without leaving evidence that there was a problem in one of the layers. This is especially true for finishes (polyurethane, etc...) that don't melt into the previous layer (like lacquer does). After sanding, you'll want to remove as much dust as possible from the surface. You can wipe it with solvent and a lint-free cloth. Mineral spirits will work but I prefer acetone because it dries almost instantly. You can also use a 'tack-rag'. It's a lint-free cloth lightly coated with rosin. If you use a tack cloth, wipe lightly (so you don't transfer any of the sticky material to the piece). It's also a good idea to use a newly opened tack rag for critical pieces. If you use a rag that has accidentally contaminated with oil or silicone, it could cause problems with the next layer applied. One problem that you may run into when applying a finish is fish-eyeing. When a contaminant is on the surface where a finish is being applied, the finish will crater (for lack of a better word). There will be hundreds of tiny spots where the finish won't stick. When this happens, you can sometimes rub the surface with the finish enough to get adhesion but if you need a fine finish, you should stop and remove the finish you're applying with solvent and then re-apply the finish. When applying the finish, you need to have plenty of light and you need to look at the piece from all angles, including looking at the reflections of nearby objects on the surface of the wood. This will help you to see any defects in the finish. Many people want a waterproof finish and try to use a polyurethane that's meant for floors or decks. This won't generally work for fine finishes (as you may want for a gunstock). You'll want to use a thin wipe-on finish. The Minwax Wipe-on Poly and the Formby's Tung Oil Finish both work well. Wipe-on finishes are meant to be... wiped on. Many are to be applied in very thin layers, especially in the last few layers. If you're working with a piece that soaks up a lot of the top-coat finish (not the stain), it may be best to apply it heavily in the early layers. This can be done with a brush but works just as well with a gloved hand. Dip your fingers in the finish and keep rubbing it into the surface. Do this until it stops drawing it in. When it stops drawing it in, wipe the surface to remove all of the excess finish. After applying it heavily like this, you should re-check it regularly for at least 15 minutes after it's been wiped. Sometimes finish that was absorbed into the pores will well up. If this is not wiped away before it dries, it will mean that you'll have to do a lot of sanding to remove it. When wiping the last layers on, it's generally best to use an applicator that has very little surface texture and produces very little lint. The blue shop towels are a good choice for oil based finishes. You may be tempted to fold the towels so that you're using multiple layers but that generally just wicks the finish to the center of the cloth. Try to use a single layer. To cover a larger area without wasting a lot of finish material, wrap the towel around a zip-lock bag that's filled with soft cloths (two small terrycloth towels used below). This will give you more surface area but it won't allow the finish material to soak into the rags that you use as stuffing. If you do this, roll the towels so that the surface that will be against the piece of wood has no wrinkles. Tape the paper towel to the ziploc bag and again on itself. If you don't tape it to the ziploc bag, the roll can fall out.
Note: In some instances, applying a finish smoothly can be difficult because it dries too quickly. If you live in a humid areas like I do, applying the finish outdoors at night or in the early morning will slow down the drying of the finish and will allow you to smooth it out better before it gets too dry. As was previously stated, you need very good light when doing this. Applying a finish near a light at night can be a problem because insects may be drawn to the light. If you wear a headlamp, you can get far enough from the larger, brighter light to prevent the insects from getting into the finish. The larger light will allow you to check the surface for imperfections as the light reflects off of the surface of the piece.
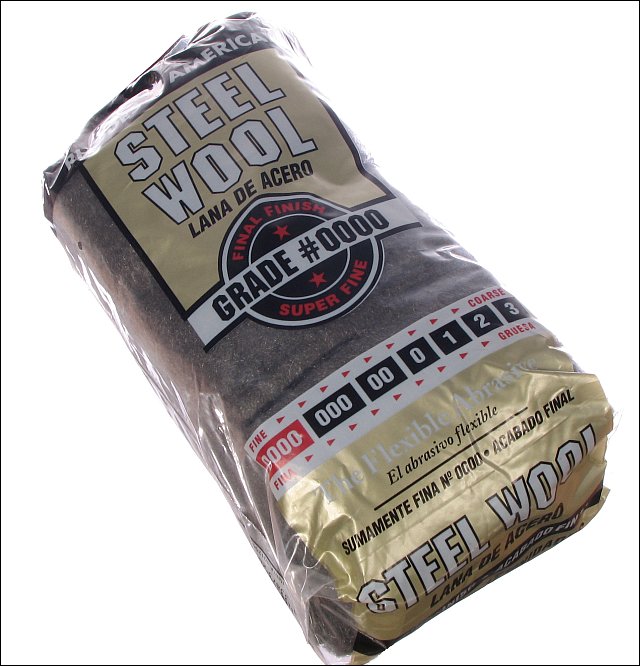
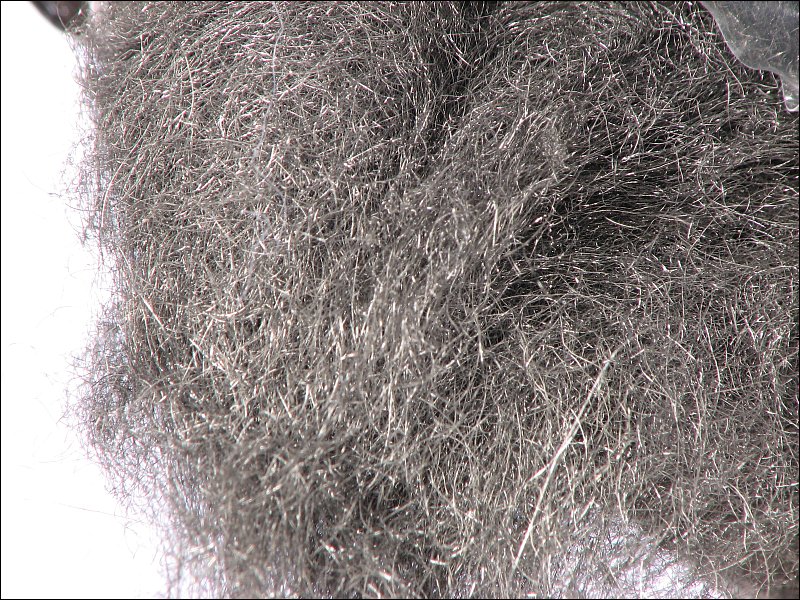
Sanding the Finish: In some instances, you'll sand the finish to make it more glossy and sometimes to make it more dull. Many times, very fine steel wool (0000 steel wool - the finest commonly available) is used to sand the surface, especially when you want to knock down a glossy finish.
 To add gloss, you may wet-sand with increasingly fine sandpaper (some use sandpaper as fine as 1500 grit). When using sandpaper, you have to be very careful not to break through the finish, especially on the various corners or high-spots. When working to achieve a super glossy surface, you must be careful not to allow the sandpaper to crinkle. The hard edge of the sandpaper (even when wet-sanding) can badly damage a super-fine finish. When you have the surface as smooth as you desire, you can apply a paste wax. Some people use car wax with a high carnauba content. When working with a wood that has deep/open grain and you're trying to knock down a glossy finish, you should know that it's difficult to knock down the shine in the grain/pores (when they haven't been completely filled). When using sandpaper, you will not be able to reach the finish in the small troughs of deep grain and they will remain shiny (which looks bad). Steel wool can better get into the grain but it takes a bit of work to get it all uniformly dulled. This is something that you must consider when initially filling the grain. If you desire a flatter (less glossy) finish, you should use a finish that's a matte or satin finish. These will produce less sheen so the finish in the deep pores will be less shiny and therefore won't require any further work.
|
|
|
|
 For most of this work, you will need gloves. If you don't know if you're allergic to latex, buy nitrile or vinyl gloves. Buy a box of 50 or 100. They are not generally reusable and you'll use a lot of them for most projects (especially those where you use rags instead of brushes to apply the finish).
